3. Activating/Deactiving Profiles
Mod profiles allow you to use multiple mods with the same installation. The mod profile will allow you to choose which scripts will be enabled for which mod and backs up save games allowing you to have seperate save games for each mod.
There is also a profile for a Vanilla Game, when activate, it will only enable signed packages, all others will be disabled.
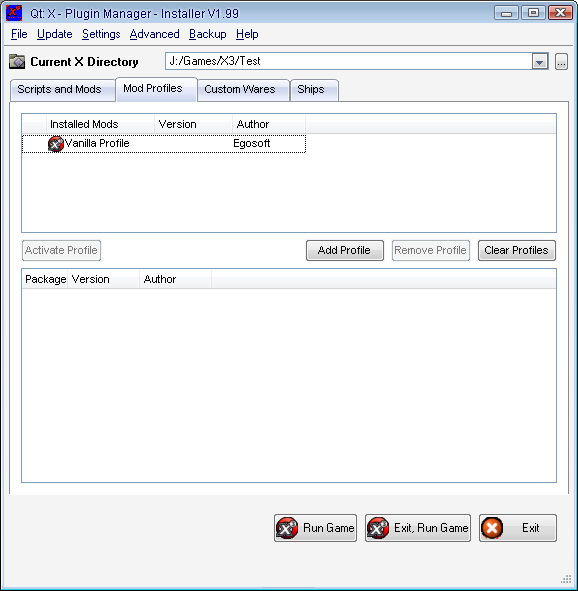
To access the Mod Profiles, you just have to select the Mod Profiles tab in the Installer.
The first box displays the current profiles that are available, the second will display the selection for which packages you wish to include. The Vanilla Profile will always be there and cant be removed, it will also not display any packages to select from.
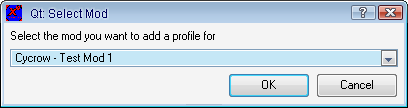
To add a new mod profile, simply select the Add Profile Button, this will display all mod packages that are currently installed, select the one you wish to create a profile for.
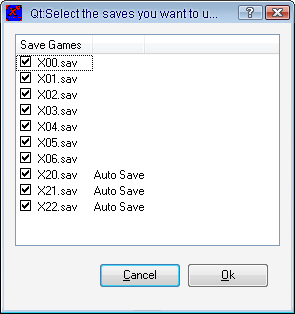
Next you will be presented with the save game display. If you currently have any saved games, they will be displayed in the list. Selecting the saved games will copy these for use with the profile. So when activating the profile, these saved games will be copied for use with the game.
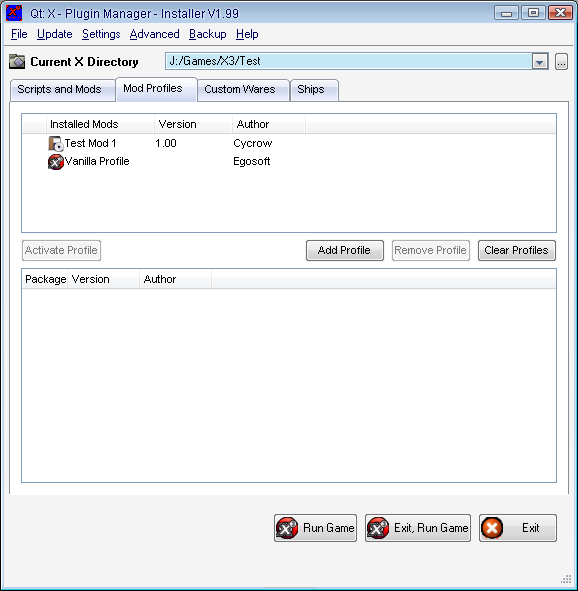
Once selected, the profile will be created, then it will be displayed in the profiles list.
In the first column, you will see a green light if the profile is currently active, you can only have 1 profile activated at a time. To activate the profile, select it from the list and press the Activate Profile button.
To activate the Profile, all you need to do is selet the profile in the list, then click on the "Activate Profile" button to the bottom left of the list.

To deactivate the profile, simply select the activated profile and click the button again. If you select another profile and activate it while you already have an activated profile, the current activated profile will be deactived first.
when you activate the profile, any scripts or ships will be disabled/enabled depending on thier settings (see below).
To remove an existing profile, just select it from the list and select the "Remove Profile" button. The "Clear Profiles" button will remove all profiles.
IF you remove the currently activated profile, it will be deactivated first. You cannot remove the vanilla profile, and clearing profiles will not remove it either.
Finally, you can customise a profile so that it can disable certain ships or packages, which allows each profile to have a seperate set of packages installed.
To customise the profile, simply select it from the list, and then in the list below you can choose which packages to installed. There are 2 sections, scripts and ships, checking the box will cause it to display all packages that you can disable. If the section is not checked, then all packages will be enabled in the profile.

Just uncheck each of the packages you dont wish to have enabled when the profile is running. Any unchecked profiles will be disabled when activating the profile.
Packages have to be globally enabled for them to be enabled in the profile, disabling them normally, would mean the packages are not enabled, even if the profile has them enabled.